Create Agents
If there isn’t an agent that helps with your needs, create one! Creating an agent is simple, and once it works and helps you, share it so your team and the Tero community can benefit too.
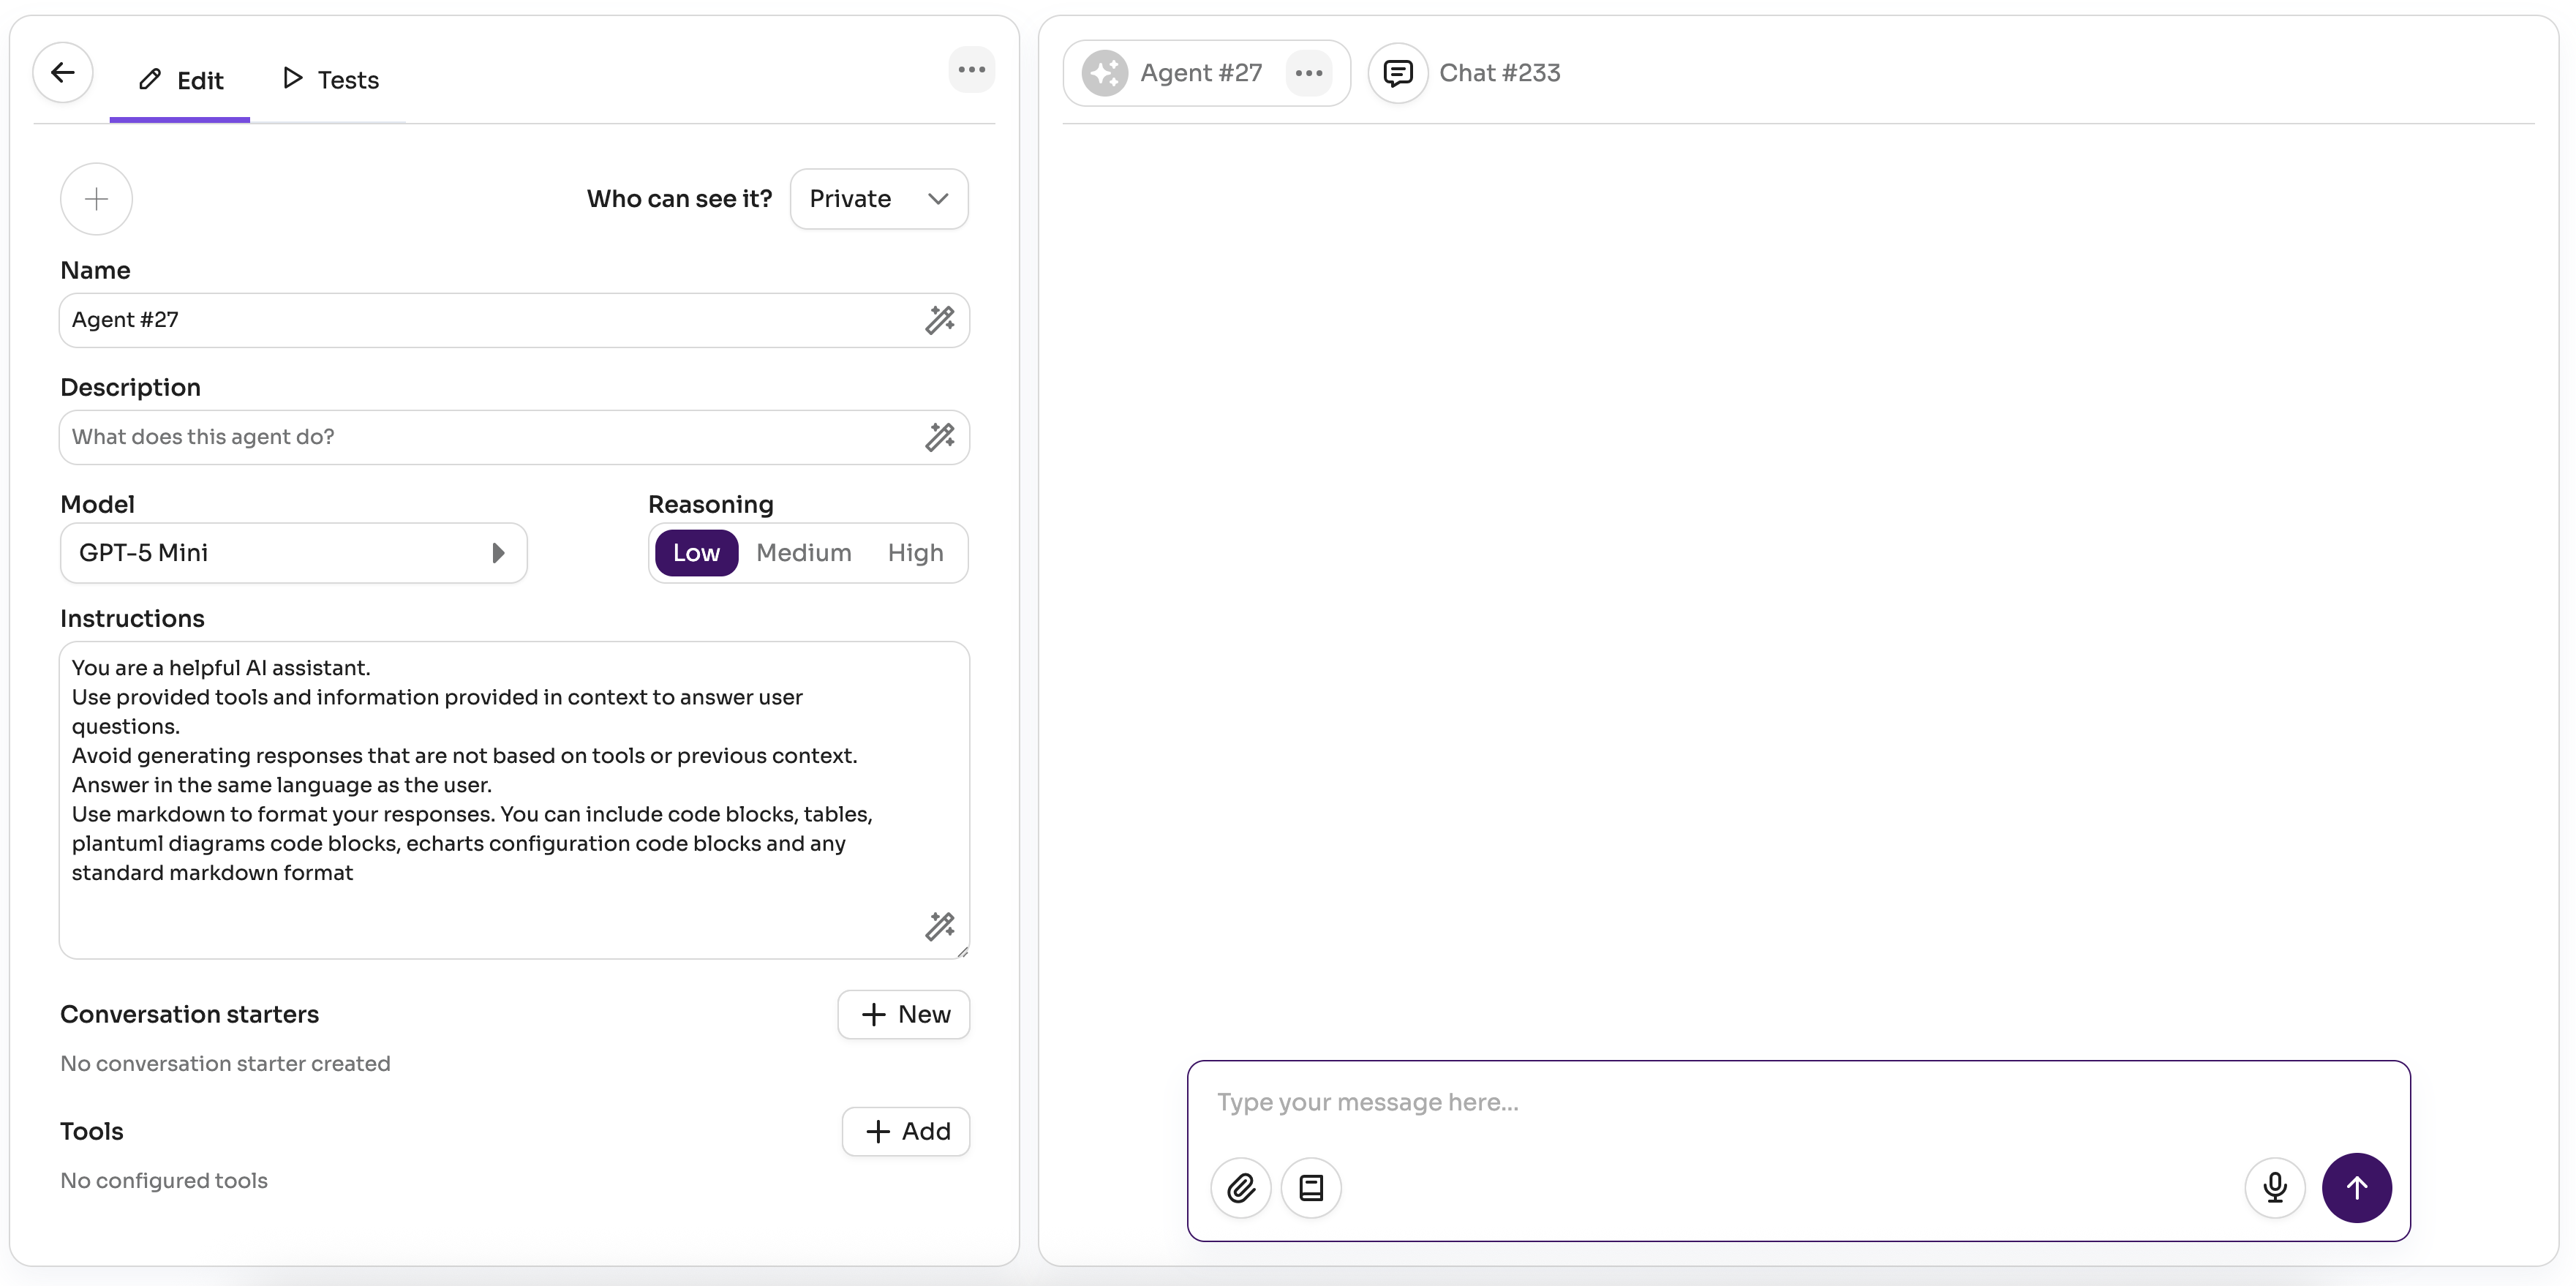
While you create or edit an agent, every change is saved automatically and you can try your changes right away in the chat on the right.
Clone
One of the easiest ways to create an agent is to clone an existing one. This lets you adapt an agent to your context (project, preferences, way of working), or create similar agents reusing existing ones as templates.
You can clone an agent from the agent detail dialog in Explore agents or from any chat with that agent.
Basic Info
When you create an agent, choose a good icon, name, and description. This helps quickly identify it among other agents.
Names and descriptions are purposely short in Tero to support quick scanning and selection. Think of the user and be succinct so the agent’s purpose is clear.
Auto-generate
Tero can auto-generate the name, description, and system prompt from the other fields. If you’ve set some fields, use the magic wand to generate or refine the rest. It’s handy for starting values or quick adjustments.
Model
Tero supports a growing variety of LLM models you can use as the basis for your agent. The model is like the agent’s brain: it analyzes each user request, plans how to answer using the configured tools, and either generates an answer or invokes tools as needed.
Available models in your Tero instance depend on how it’s configured. Currently Tero supports models from OpenAI (GPT), Azure OpenAI (GPT), AWS Bedrock (Claude), and Google (Gemini). The community continues to expand this list.
Cheaper & faster first
When creating an agent, start with cheaper and faster models. They’re easier to use and help you, and others, avoid unnecessary budget spend (in general more powerful = more expensive).
Experiment
Different models excel at different tasks (e.g., Claude often shines for code; GPT can be great for brainstorming or writing). Experiment, and don’t assume a new version of a model behaves like the previous one.
Depending on the model type, you may also set Temperature or Reasoning level.
Temperature
Temperature controls how much the agent’s answers vary. For more creative outputs (e.g., brainstorming), choose Creative. For more consistent, precise answers with less variation, choose Precise. Use Neutral for a balanced behavior.
Reasoning Level
Reasoning level defines how much the agent analyzes before answering. More reasoning usually means better results but slower responses. Use High for complex tasks, Low for simple tasks, and Medium for relatively simple ones.
Instructions
The instructions (aka system prompt) define how your agent responds to user requests. A good system prompt usually includes a role the agent should assume, the main tasks it solves, formatting expectations for answers, and optionally examples of inputs and outputs.
Short and simple
Prefer short, simple prompts. The bigger the prompt, the harder it is to follow by the agent and for you to maintain.
Agent to tune system prompt
Use an agent to help you improve your system prompt. You can use the Agents from Scratch agent if you need help to start from scratch.
Divide & Conquer
Avoid “do everything” agents. Focus each agent on a specific task and create multiple agents for different needs. It keeps instructions short, answers better, reduces budget by limiting context, and makes it easier for users to discover the right agent.
In future versions of Tero, we plan to make it easier to combine agents to solve a task, so don’t worry about copy/pasting between chats—we’ll have a better solution soon 😉.
Optimize
Start simple, then optimize. Review the Thought Process to see how the agent solves requests and add step-by-step guidance to the prompt for recurring tasks. This makes answers faster, more predictable, and reduces budget usage. With detailed instructions, you can often use cheaper & faster models too.
Markdown
Ask the agent to format answers in Markdown. You’ll get cleaner results (headings, lists, tables, code blocks, etc.).
PlantUML
If you need UML or general diagrams, ask the agent to use PlantUML.
When doing so, instruct the agent not to wrap diagrams in code blocks so they render properly.
Example — this generates only the text of the diagram:
```plantuml
@startuml
[User] --> [App]
@enduml
```
And this renders a diagram image:
@startuml
[User] --> [App]
@enduml
ECharts
You can also ask the agent to present information using charts with ECharts.
Conversation Starters
When you create an agent, consider adding Conversation starters. They help new users understand what the agent can do and get going quickly.
Tools
Tools extend what your agents can do. Below is the list of currently supported tools. Expect it to grow as the community contributes new ones.
Keep it lean
Enable only the tools your agent truly needs. Fewer tools makes the agent faster, cheaper, and more predictable.
Docs
Upload files to your agent so it can use their content when answering questions. The agent searches the uploaded files using semantic similarity and grounds its responses in what the documents actually say, citing the source files.
This is useful for agents that need to reason over technical documentation, test plans, specifications, runbooks, or any domain-specific knowledge that isn't in the model's training data.
The agent can:
- Answer questions from uploaded documents using semantic search across all files
- Cite sources — responses reference the specific file sections they were drawn from
- Reason across multiple files — the agent considers all uploaded files together when answering
Supported file types include PDF, plain text, Markdown, and common document formats.
Basic vs Advanced PDF processing
Basic processing is faster and works well for most PDFs. Advanced processing (when available) handles complex PDFs with tables, multi-column layouts, and embedded images more accurately, but it costs more and takes longer.
Use Advanced only when the agent consistently misses or misreads content from your PDFs.
Web
Search the web and extract text content from public URLs. The agent can look up current information beyond its training data or read specific pages as part of answering a request.
The agent can:
- Search — query the web and retrieve a ranked list of relevant results with snippets
- Extract — read the full text content of public URLs, including documentation sites, blog posts, changelogs, and issue trackers
This tool requires no configuration by the agent creator. It is available when a Tero admin has configured a web search API key (Tavily or Google Custom Search) for the instance.
Search vs Extract
The agent uses search to find relevant pages for a query, and extract to read the full content of a specific URL. You can ask the agent to visit a URL directly, or let it search and pick the best result.
Browser
Automate real browser interactions using Playwright. Unlike the Web tool which only reads static content, the Browser tool can interact with live web pages — useful for apps that require login, dynamic content, or multi-step navigation.
The agent can:
- Navigate — open URLs, follow links, handle redirects and page transitions
- Interact — click buttons, fill forms, select dropdowns, check checkboxes, upload files
- Read — extract text, read table data, capture the current state of dynamic pages
- Screenshot — take screenshots to capture the current state of a page
- Wait — wait for elements to appear or conditions to be met before acting
This tool requires no configuration by the agent creator.
Concurrent browser sessions
Tero currently only supports 1 active browser session at a time. If multiple users try to use it at the same time they may get a notification about this.
Jira
Manage issues and track project activity in Jira Cloud. The agent can work across the full issue lifecycle and project structure.
The agent can help with:
- Issues — create, read, update, and delete issues; add comments and attachments
- Projects — browse projects and retrieve project details and statuses
- Search — use JQL (Jira Query Language) to find issues across projects
- Users — look up user information
Authentication
This tool uses OAuth 2.0 (3LO). You need to create an OAuth app in the Atlassian developer console and provide its credentials.
Steps to set up:
- Go to developer.atlassian.com and sign in.
- Open Developer console and create a new app.
- In the left menu, go to Authorization → click Configure next to OAuth 2.0 (3LO).
- Enter the Callback URL provided by your Tero instance and save.
- Go to Permissions and add the Jira API. Enable the scopes you need:
read:jira-work— read issues, projects, and boardswrite:jira-work— create and update issuesread:jira-user— read user information
- Copy the Client ID and Client secret from the app settings.
Enter the Client ID, Client secret, and selected scopes in the tool configuration. After saving, each user will be prompted to authorize the connection with their Atlassian account.
GitHub
Search code, manage repositories, review pull requests, and track issues — all through the official GitHub MCP server.
The agent can help with:
- Issues — create, read, update, comment on, and label issues
- Pull requests — create, review, merge, and comment on PRs; request reviews
- Repositories — browse files and commits, create branches, browse releases and tags
- Users — look up user profiles and organization members
- Context — access information about the authenticated user and their teams
Info
Only the GitHub core tools are currently supported. Advanced toolsets such as Actions, Projects, Security, Discussions, and Notifications are not supported.
Authentication
This tool uses a GitHub Personal Access Token. The token is used for all requests on behalf of the agent.
Steps to get a token:
- Go to GitHub → Settings → Developer settings → Personal access tokens.
- Create a new token (classic or fine-grained).
- Grant the scopes your agent needs — for example
repofor full repository access,read:orgfor organization data. - Copy the token and paste it into the tool configuration.
Fine-grained tokens
Fine-grained tokens let you limit access to specific repositories and permissions, which is a safer choice for shared agents.
YouTrack
Report issues, log work time, and manage knowledge base articles in JetBrains YouTrack. The agent connects to the YouTrack MCP server built into your instance (requires YouTrack 2025.3 or later).
The agent can help with:
- Issues — search using YouTrack query language, create, update, assign, comment on, tag, and link issues
- Time tracking — log work time directly on issues
- Knowledge Base — search, read, create, and update articles
- Projects — find and inspect project configurations and custom field schemas
- Users & groups — look up users by name or email, list group members
Authentication
This tool uses a YouTrack permanent token and connects to the YouTrack MCP server built into your instance.
Steps to set up:
- In YouTrack, click your avatar → Profile → Account Security tab.
- In the Tokens section, click New token.
- Enter a name and select the YouTrack scope, then click Create token.
- Copy the token immediately — it is only shown once.
- In the tool configuration, enter:
- Server URL: your YouTrack MCP endpoint, e.g.
https://your-instance.youtrack.cloud/mcp - Token: the permanent token you created
- Server URL: your YouTrack MCP endpoint, e.g.
PractiTest
Manage tests, test sets, and requirements in PractiTest. The agent connects directly to your project data, making it useful for QA workflows that need to bridge AI-generated content with your test management system.
The agent can help with:
- Tests — create, read, and update test cases
- Test sets & runs — manage test sets and track execution results
- Requirements — read requirements and analyze test coverage
- Coverage analysis — identify gaps between requirements and existing tests, then create missing tests and link them back to requirements
Authentication
This tool uses a personal API token and connects to the PractiTest MCP server.
Availability
The PractiTest MCP server is available for Corporate accounts.
Steps to set up:
- In PractiTest, go to your account settings and generate a personal API token.
- In the tool configuration, enter:
- Server URL: your PractiTest MCP server URL
- Token: the personal API token
Redmine
Manage issues, projects, and time tracking in Redmine.
Enterprise Edition
This tool is only available in the Tero Enterprise Edition.
The agent can help with:
- Issues — create, read, update, and delete issues; add notes; change status and assignee
- Time tracking — log and review time entries on issues and projects
- Projects — browse projects and versions
- Search — find issues across projects using filters
Authentication
This tool uses a Redmine API key for authentication.
Prerequisite
A Redmine administrator must first enable the REST API under Administration → Settings → API → Enable REST API.
Steps to set up:
- In Redmine, click your account name in the top-right → My account.
- In the right-hand pane, find your API access key (generate one if it doesn't exist yet).
- In the tool configuration, enter:
- URL: your Redmine instance URL, e.g.
https://redmine.example.com - API Key: the key from your Redmine account
- URL: your Redmine instance URL, e.g.
MCP
Connect to any Model Context Protocol (MCP) server and expose its tools to the agent. This lets you integrate any service that provides an MCP interface without needing a dedicated Tero tool.
Once connected, the agent automatically discovers and can use all tools exposed by the MCP server — whatever those tools do (querying APIs, managing resources, reading data) becomes available in the agent's context.
Authentication
Two authentication modes are supported:
OAuth — the agent creator provides the server URL and each user authorizes via the OAuth flow when they first use the tool.
Bearer Token — the agent creator provides the server URL and a static bearer token used for all requests.
Some servers also require custom HTTP headers (for example, a workspace ID or API version header). Use the Custom headers field to add any additional headers the server needs.
Transport
The tool supports both SSE (/sse endpoint) and streamable HTTP transports. The correct transport is selected automatically based on the server URL.
Tests
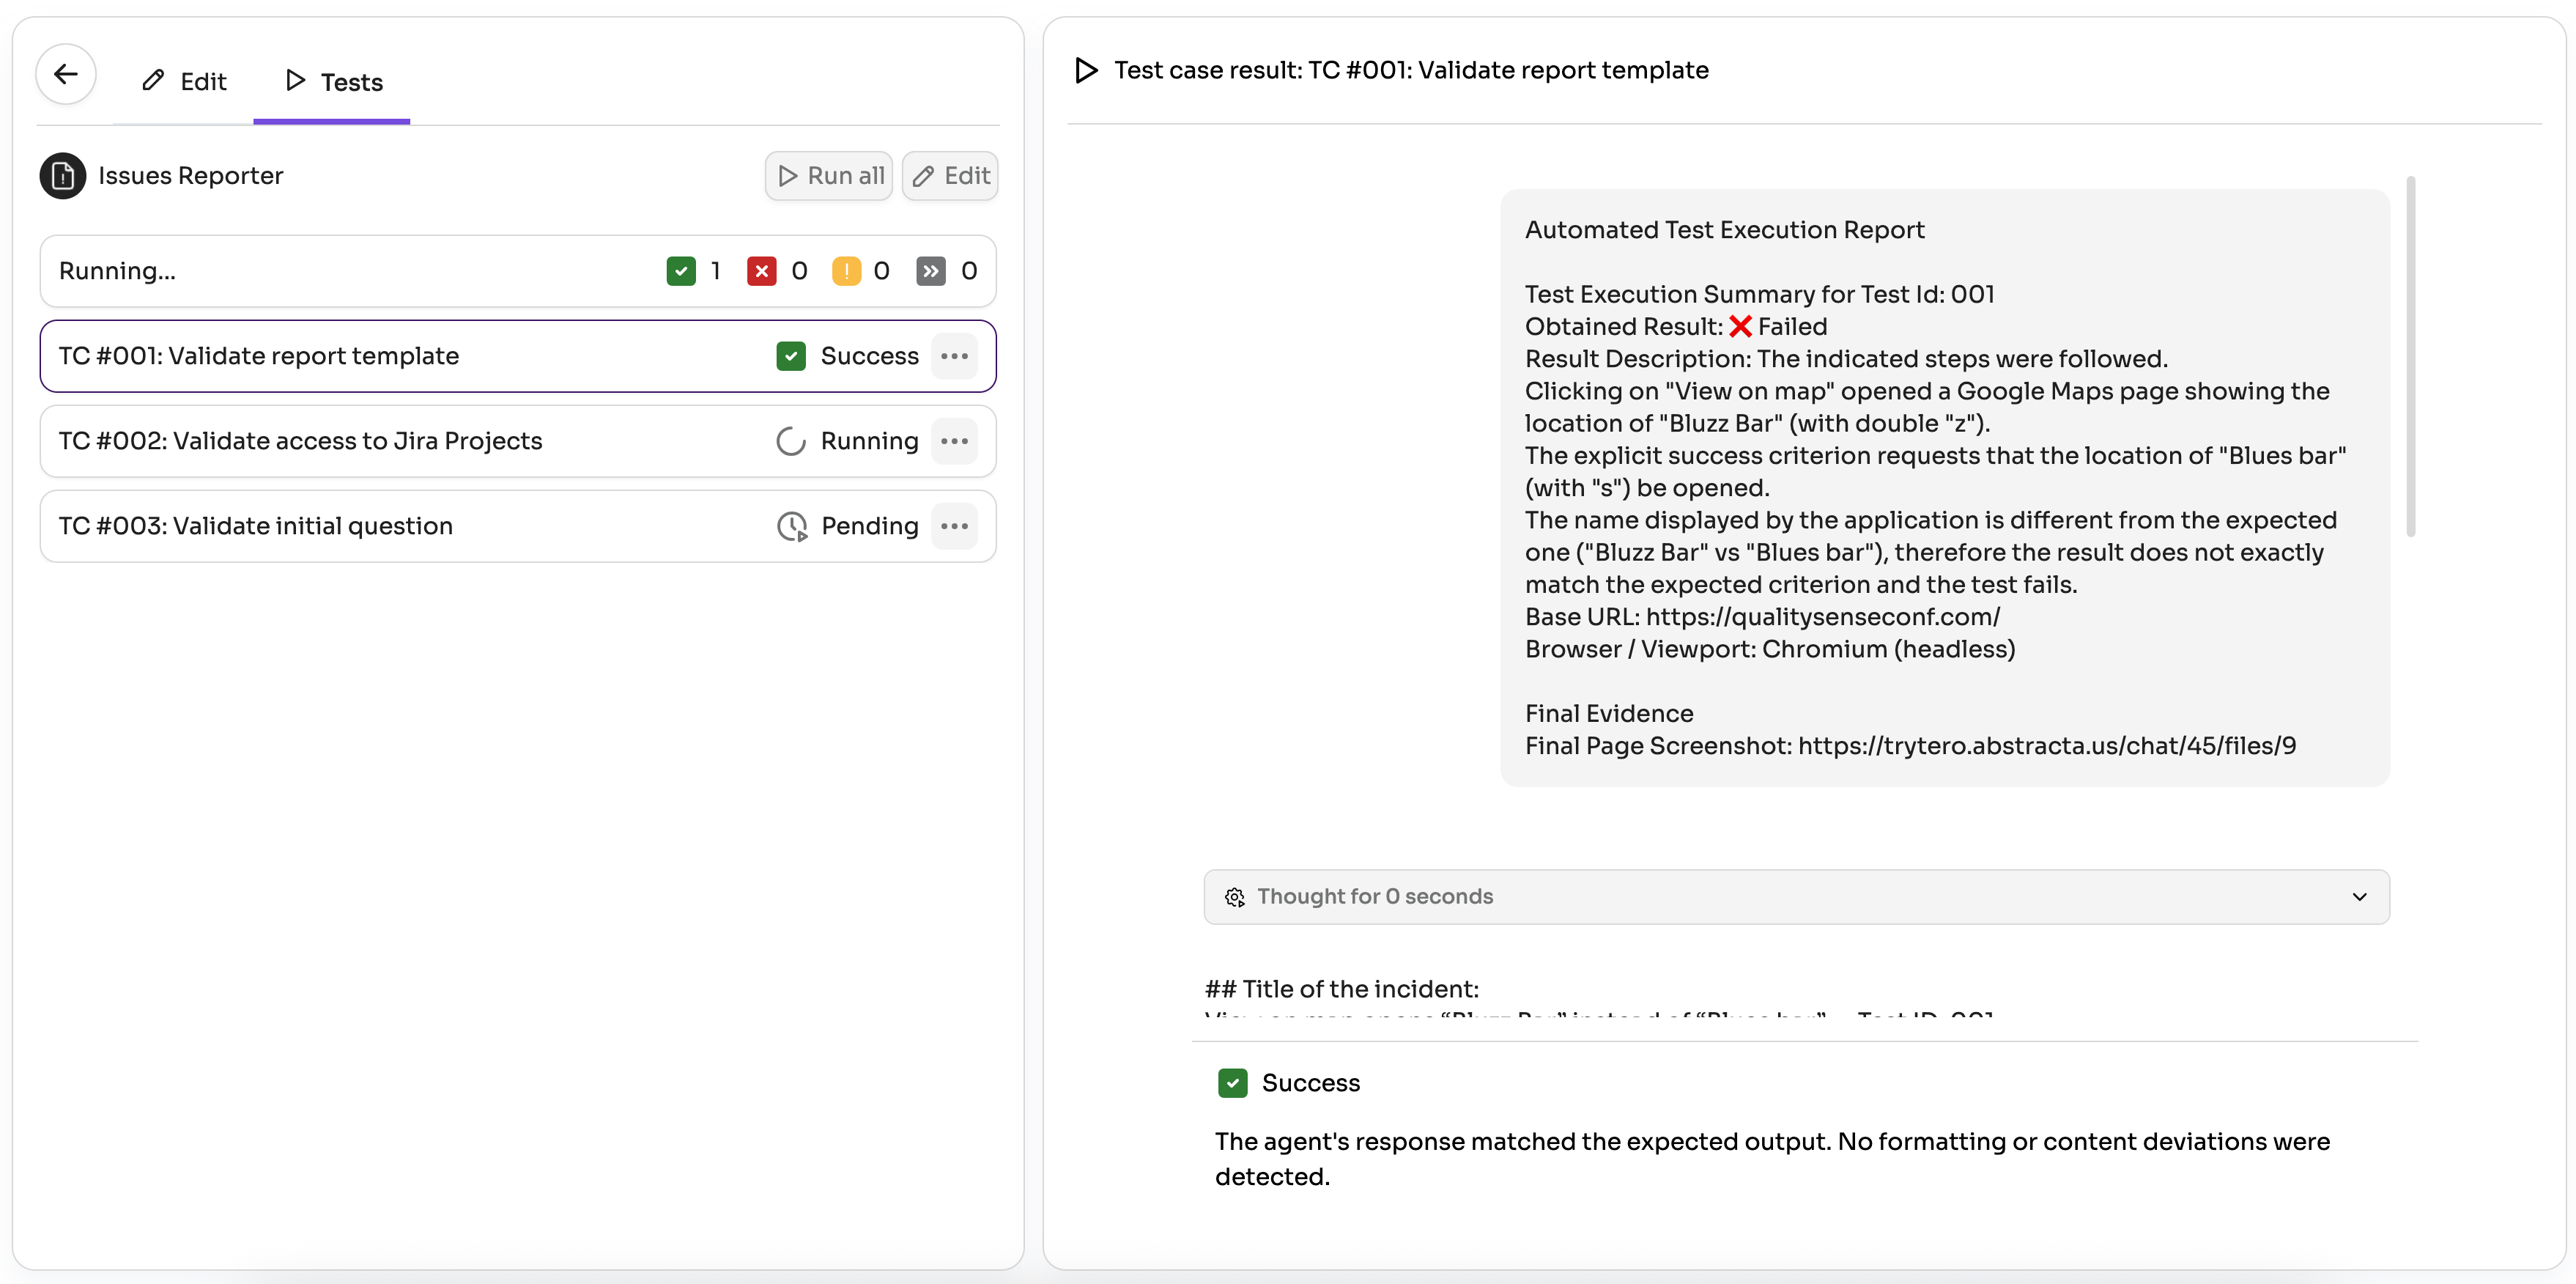
Tero focuses on software quality, and quality requires tests. Add tests to ensure your agents behave as intended.
Tests let creators and editors experiment safely. Define a test suite for your agent by specifying user inputs and example expected outputs. Then you can change models, prompts, tools, etc., and verify, by running the test suite, that your core use cases still work.
Publish
When your agent starts being useful to you, share it with your team so others can benefit too!
You can share it with any private team (only your teammates can use it), or with the Global team (all users in your Tero instance can discover and use it).
When you share an agent with a team, the team leaders can edit the agent if they need to improve it. You’ll still be able to edit it, and you’ll remain listed as the author.
Export & Import
You can move agents (or their updates) between Tero environments by exporting and importing them.
Furthermore, you can import any agents contributed by the community from the public repository of agents.
Be part of the Tero community: contribute your agents so everyone benefits! Export your agent and submit a Pull Request to the repository.